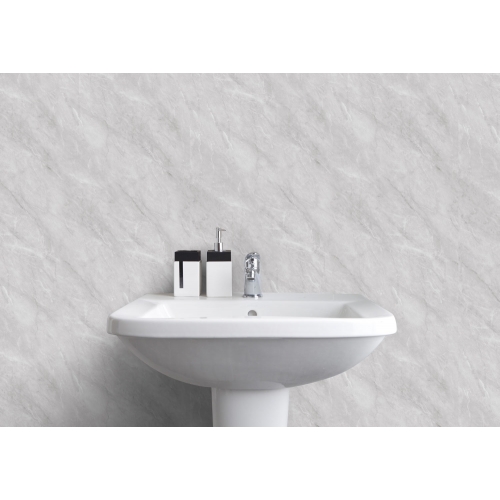
Shower wet wall - Aquabord PVC T&G 3 Wall Kit - Light Grey Marble gloss
100% waterproof and leakproof. Hygienic, easy to fit and easy to clean.
Installing tile is not the only way to end up with a beautiful shower you can be proud of. There is another way: Aquaboard Light Grey Marble panels made with high quality PVC. These panels are lighter than title, easier to install, and will not crack or chip like tiles are prone to doing.
Hollow core construction makes Aquaboard PVC panels lightweight and easy to install. Being PVC, they are 100% leakproof and waterproof. Better yet, their tongue-and-groove, click-lock technology means no joints filled with grout that can grow mould over time. Cleaning is as easy as wiping down the panels with a damp cloth.
You and a helper can install our 3-wall kit with some time and moderate DIY skills. We provide everything you need in this kit including the wall panels, corners, trims, sealant and adhesive. Everything comes with a 10-year guarantee and our hassle-free return policy.
Whether you are refurbishing existing space or building from scratch, Aquaboard Light Grey Marble panels are the perfect choice for your shower. Contact us for a free sample before you buy.
Kits contains: 3 aquaboard PVC Panels, 4 Chrome Edge Trim, 2 Chrome Internal Corners, 3 Cladseal Base Trim with Endcaps, 6 High Power Flexi Bond Adhesive & 3 Silicone Sealants.
First time buying wall cladding? Learn more and compare products here.
Length
2400mmWidth
1000mmThickness
10mmQty in Pack
3A professional finish can be achieved by anyone with basic DIY skills and a second person to help.
YOU WILL NEED
- Measuring tape and square
- Pencil
- Fine tooth saw (electric or hand held)
- Craft knife
- Adhesive and applicator gun
- Spirit level or plumb line
- Silicone sealant
- Safety glasses and gloves
HOW TO INSTALL
Step 1: Apply fixing trims to the wall
Measure the back sections of fixing trims for the corners and edges, cut to size with the saw. Apply adhesive and attach directly to the wall.
Step 2: Attach the panels to the fixing trims
Measure panels and cut to size with the saw. Apply adhesive to the fixing trims and walls (or tiled surface) and attach panels. Panels slot together using a tongue and groove system.
Step 3: Apply decorative finishing trims (front sections)
Measure and cut decorative front trims with the saw. Apply adhesive and tap into place. Use silicon sealant to seal any gaps around the base of the shower tray, pipework and fittings.
Detailed instructions are included in every pack, or download here
Delivery & Returns - Free Delivery on orders over £150
When you order online with us we will contact you to organise a suitable delivery date - normally by email.
If you need something special, such as an awkward location, or help up stairs, then let us know, we love to help.
Your delivery
Most of our products are very large measuring from 2.4m to 6m in length, this makes the product difficult to deliver and there are really only 2 couriers in the UK that will handle the longest length. Very occasionally there is damage to our product during delivery. Please inspect the package on delivery and make a note if there is damage. We will never hold you responsible for damage during delivery.
Where do we deliver?
We deliver right across mainland GB as standard. We can arrange delivery to NI and location off mainland GB and prices are dependent on specifics - please ask for a price.
Collection
All products are available for collection from our premises at
Unit 1,
Shepcote Business Park,
Europa Drive,
Sheffield,
S9 1XT.
NO HASSLE RETURNS


 Delivery satisfaction guarantee
 Susan Rhodes
 All 100% waterproof
 10 Year Guarantee
